
Examples of Helpful Photos
Posted by Jim Noort on 25th Sep 2026
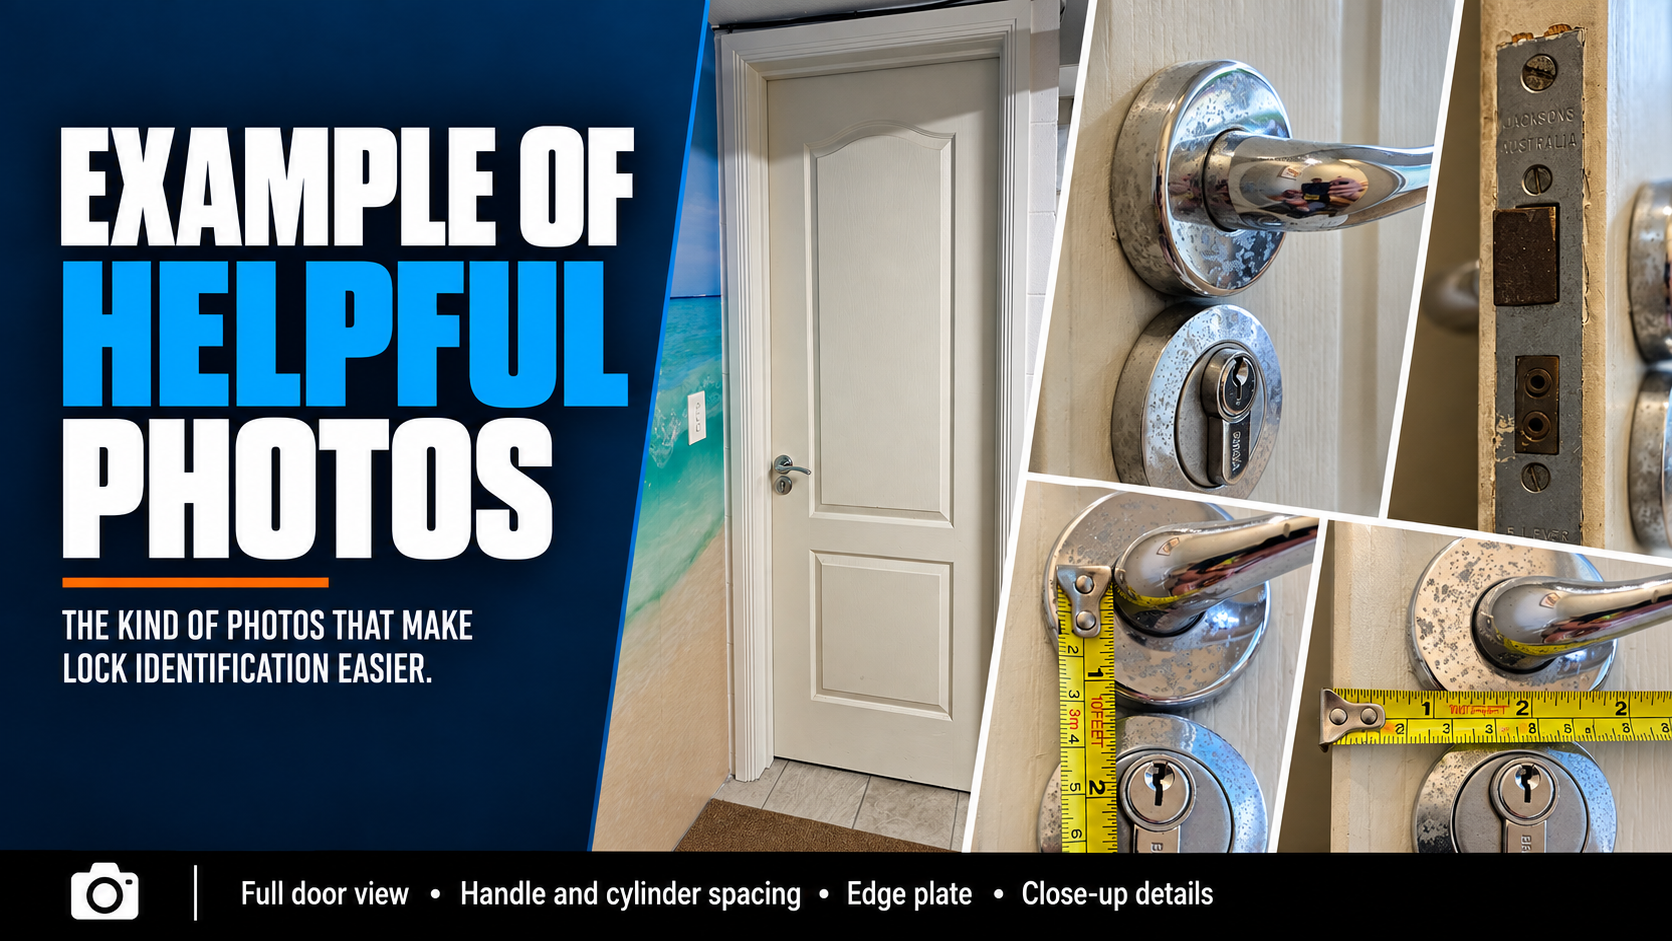
The wide shots, close-ups and tape-measure photos that let our locksmiths identify your lock and confirm what will fit — before anyone visits or anything is ordered.
Help us help you. Most lock enquiries start with a sentence like “I need a new lock for my front door”. That sentence could describe dozens of different door and lock combinations, each needing different parts. A handful of good photos tells our locksmiths which one you have, and what will actually fit, in minutes.
The measurements in this guide follow the lettered diagrams in Chapter 02 — Measuring Your Door, so the two read well side by side.
Example 1 — Timber Door With a Mortice Lock
This set covers an internal timber panel door fitted with a mortice lock, a lever on a round rose and a euro cylinder below it. It covers every shot we look for, and every measurement matches a lettered point on the Mortice Lever & Escutcheon diagram in Chapter 02.
 Wide Shots: the Whole Door From Both Sides


These two shots take ten seconds and answer a surprising number of questions: it is a painted timber panel door, it sits inside a painted timber frame against a block wall, and the open shot shows the hinge side, the swing, the door stop on the floor and the room beyond. Together they tell us the door’s handing — see how to determine your door’s handing if you want to work it out yourself.
 The Close-Up: Hardware and Door Edge Together
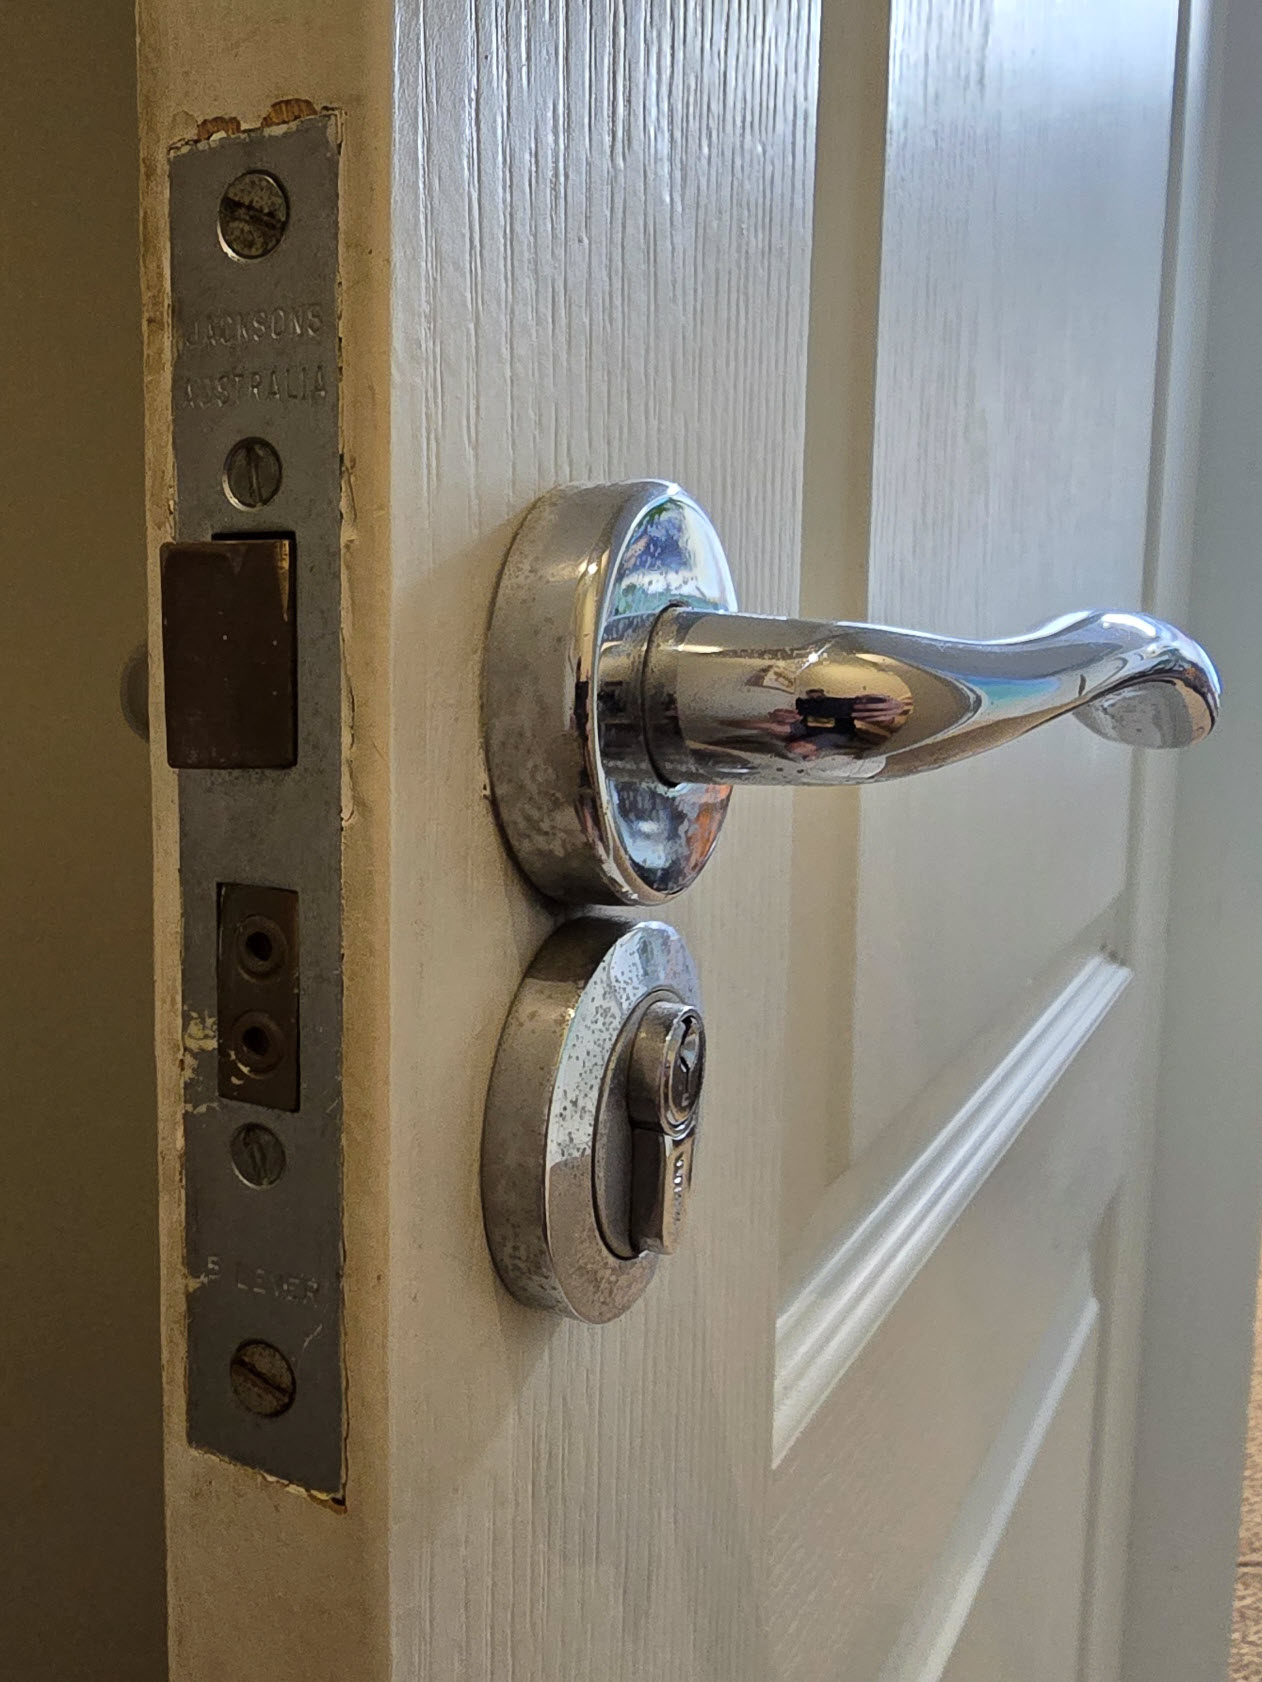
This is the single most useful photo in the set. Taken with the door open and the phone at an angle, it shows the lever, the cylinder escutcheon and the door edge together, so we can see how the face hardware lines up with the lock body inside the door.
It also catches the stamps. The faceplate reads Jacksons Australia and 5 Lever, which identifies the make and type of lock body before a single screw is touched. The cylinder, clearer in the tape-measure shots below, is marked Brava.
Hardware and edge in one frame — with the maker’s stamp readable.
 Backset: Door Edge to Cylinder Centre
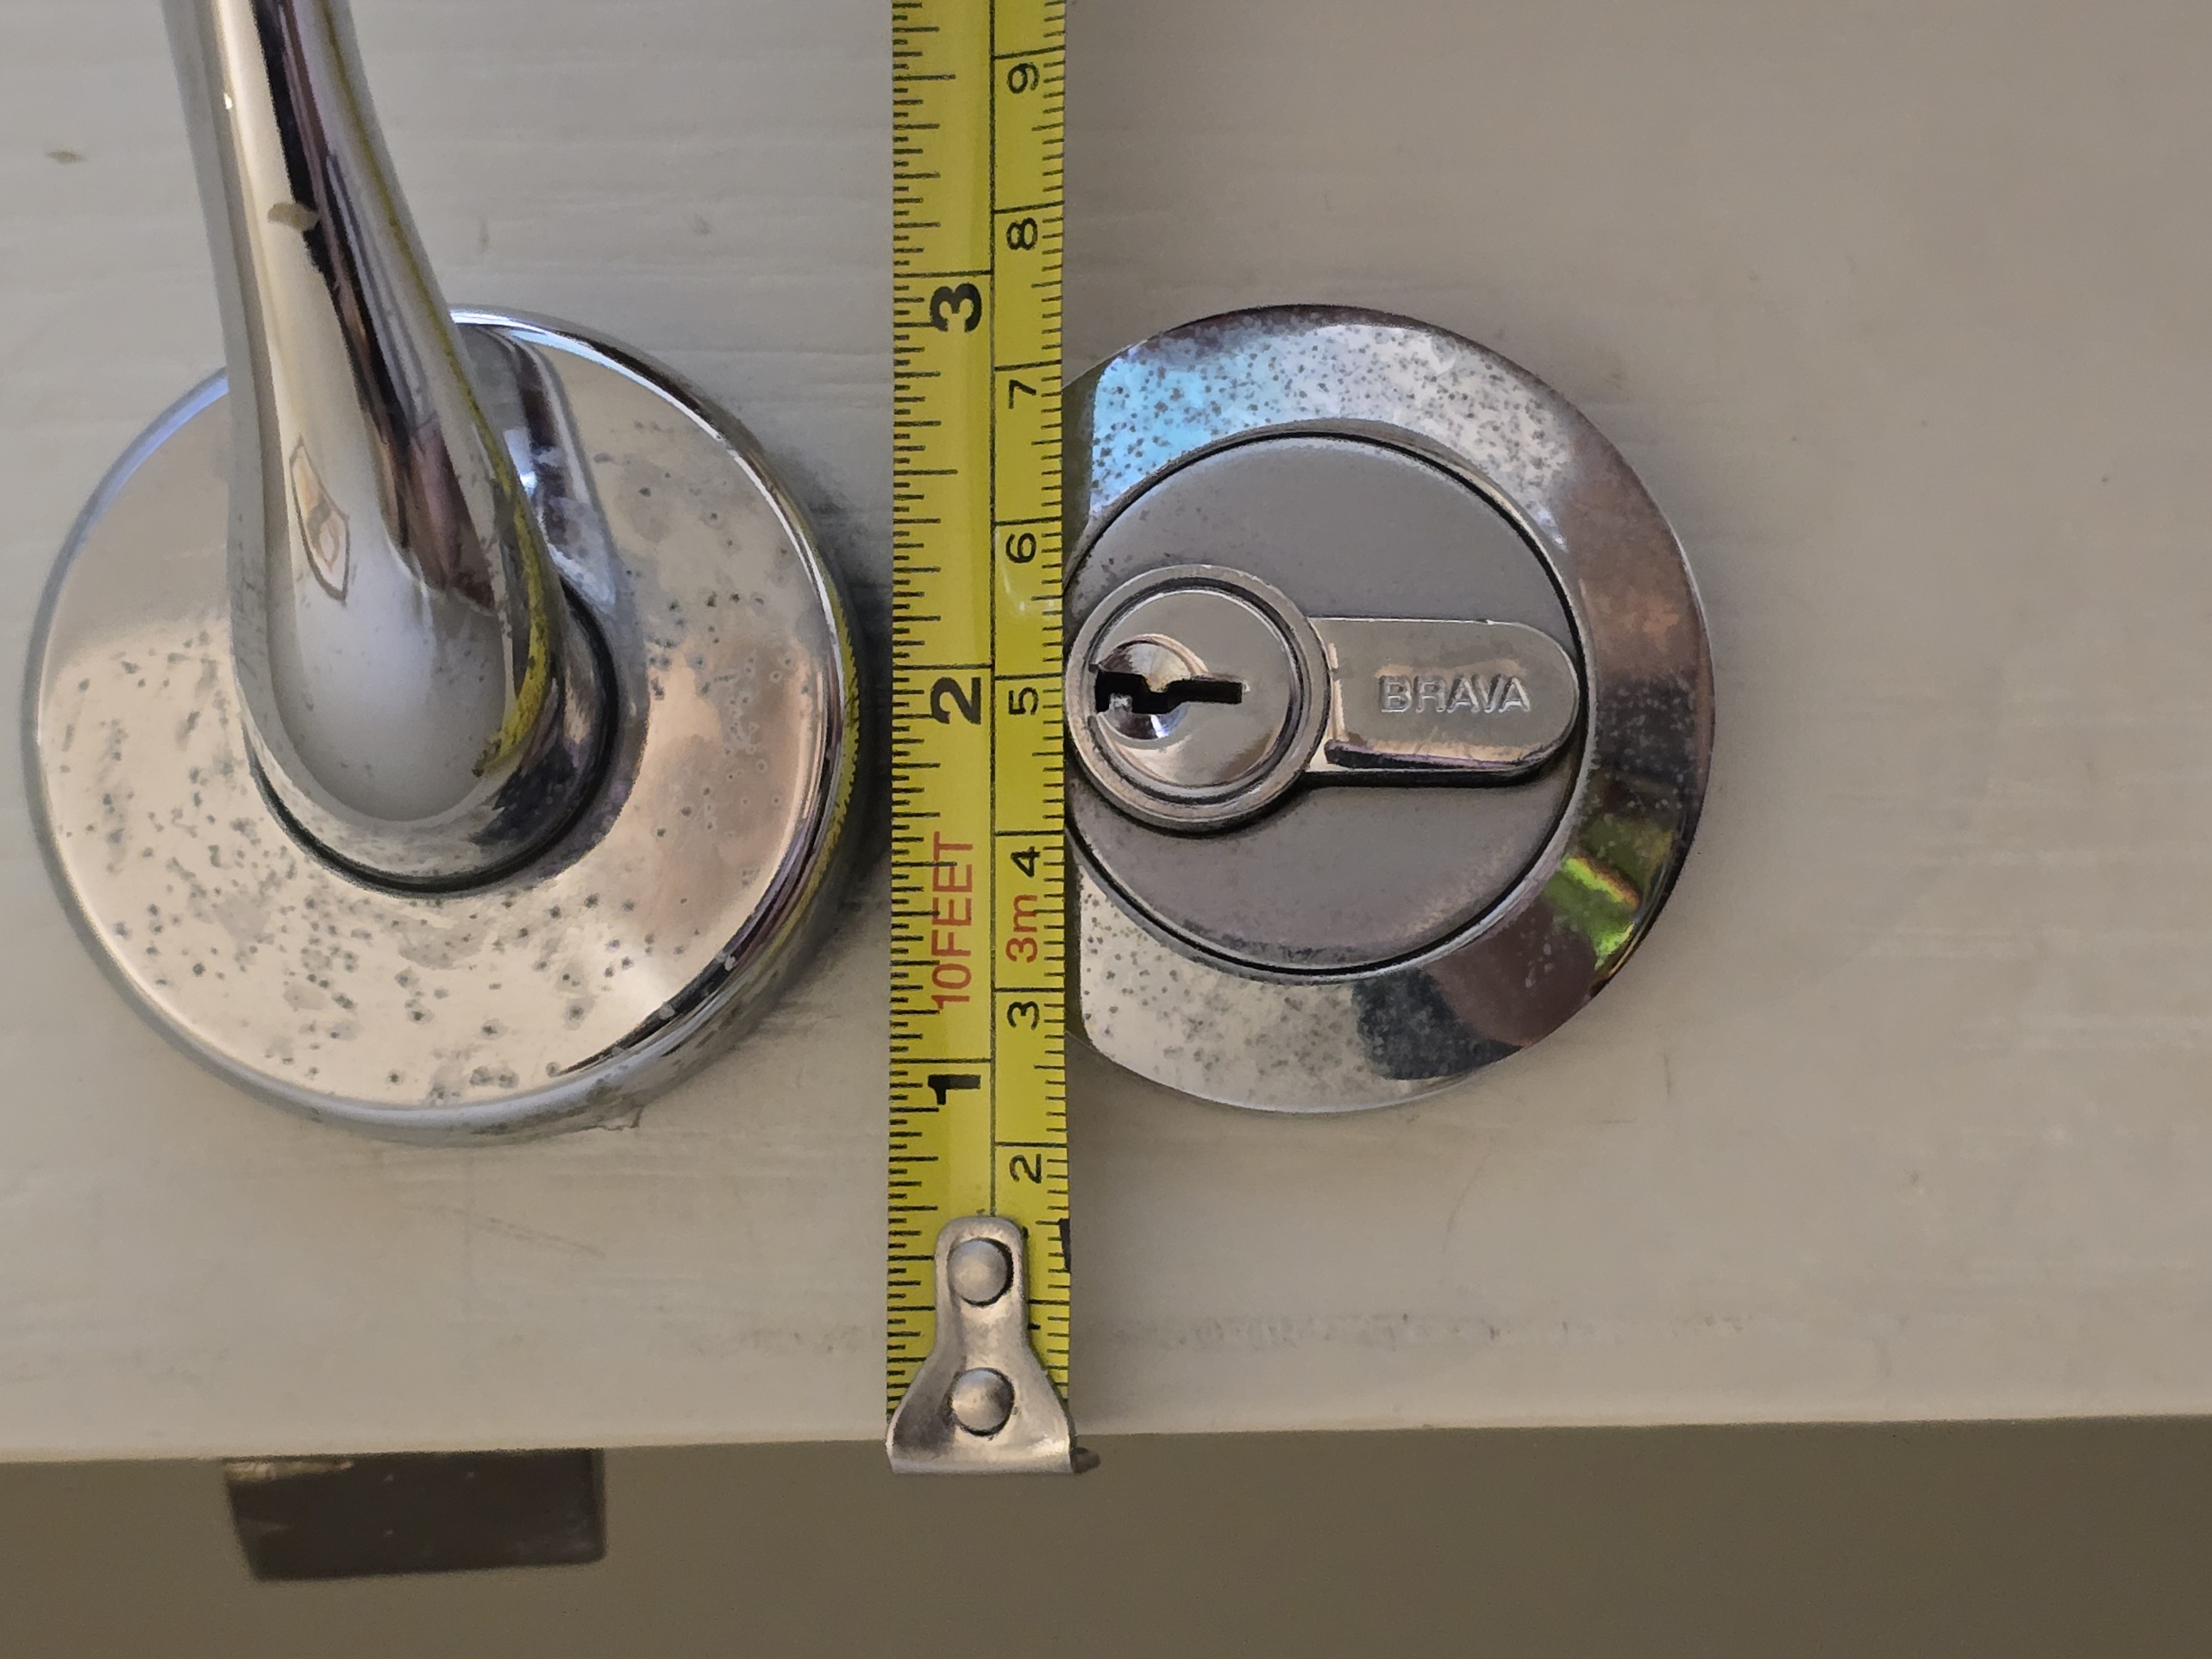
Backset is the distance from the door edge to the centre of the cylinder, keyhole or handle spindle — point (d) on the Chapter 02 diagrams, and the measurement that decides whether a replacement lock will line up with the existing holes.
This is a textbook example: the tape is hooked over the door edge, it runs straight and level just under the lever rose, and the cylinder centre sits clearly against the scale. For the full method, see how to measure your backset.
Tape hooked on the edge, read at the centre of the cylinder.
 Pitch: Handle Centre to Cylinder Centre
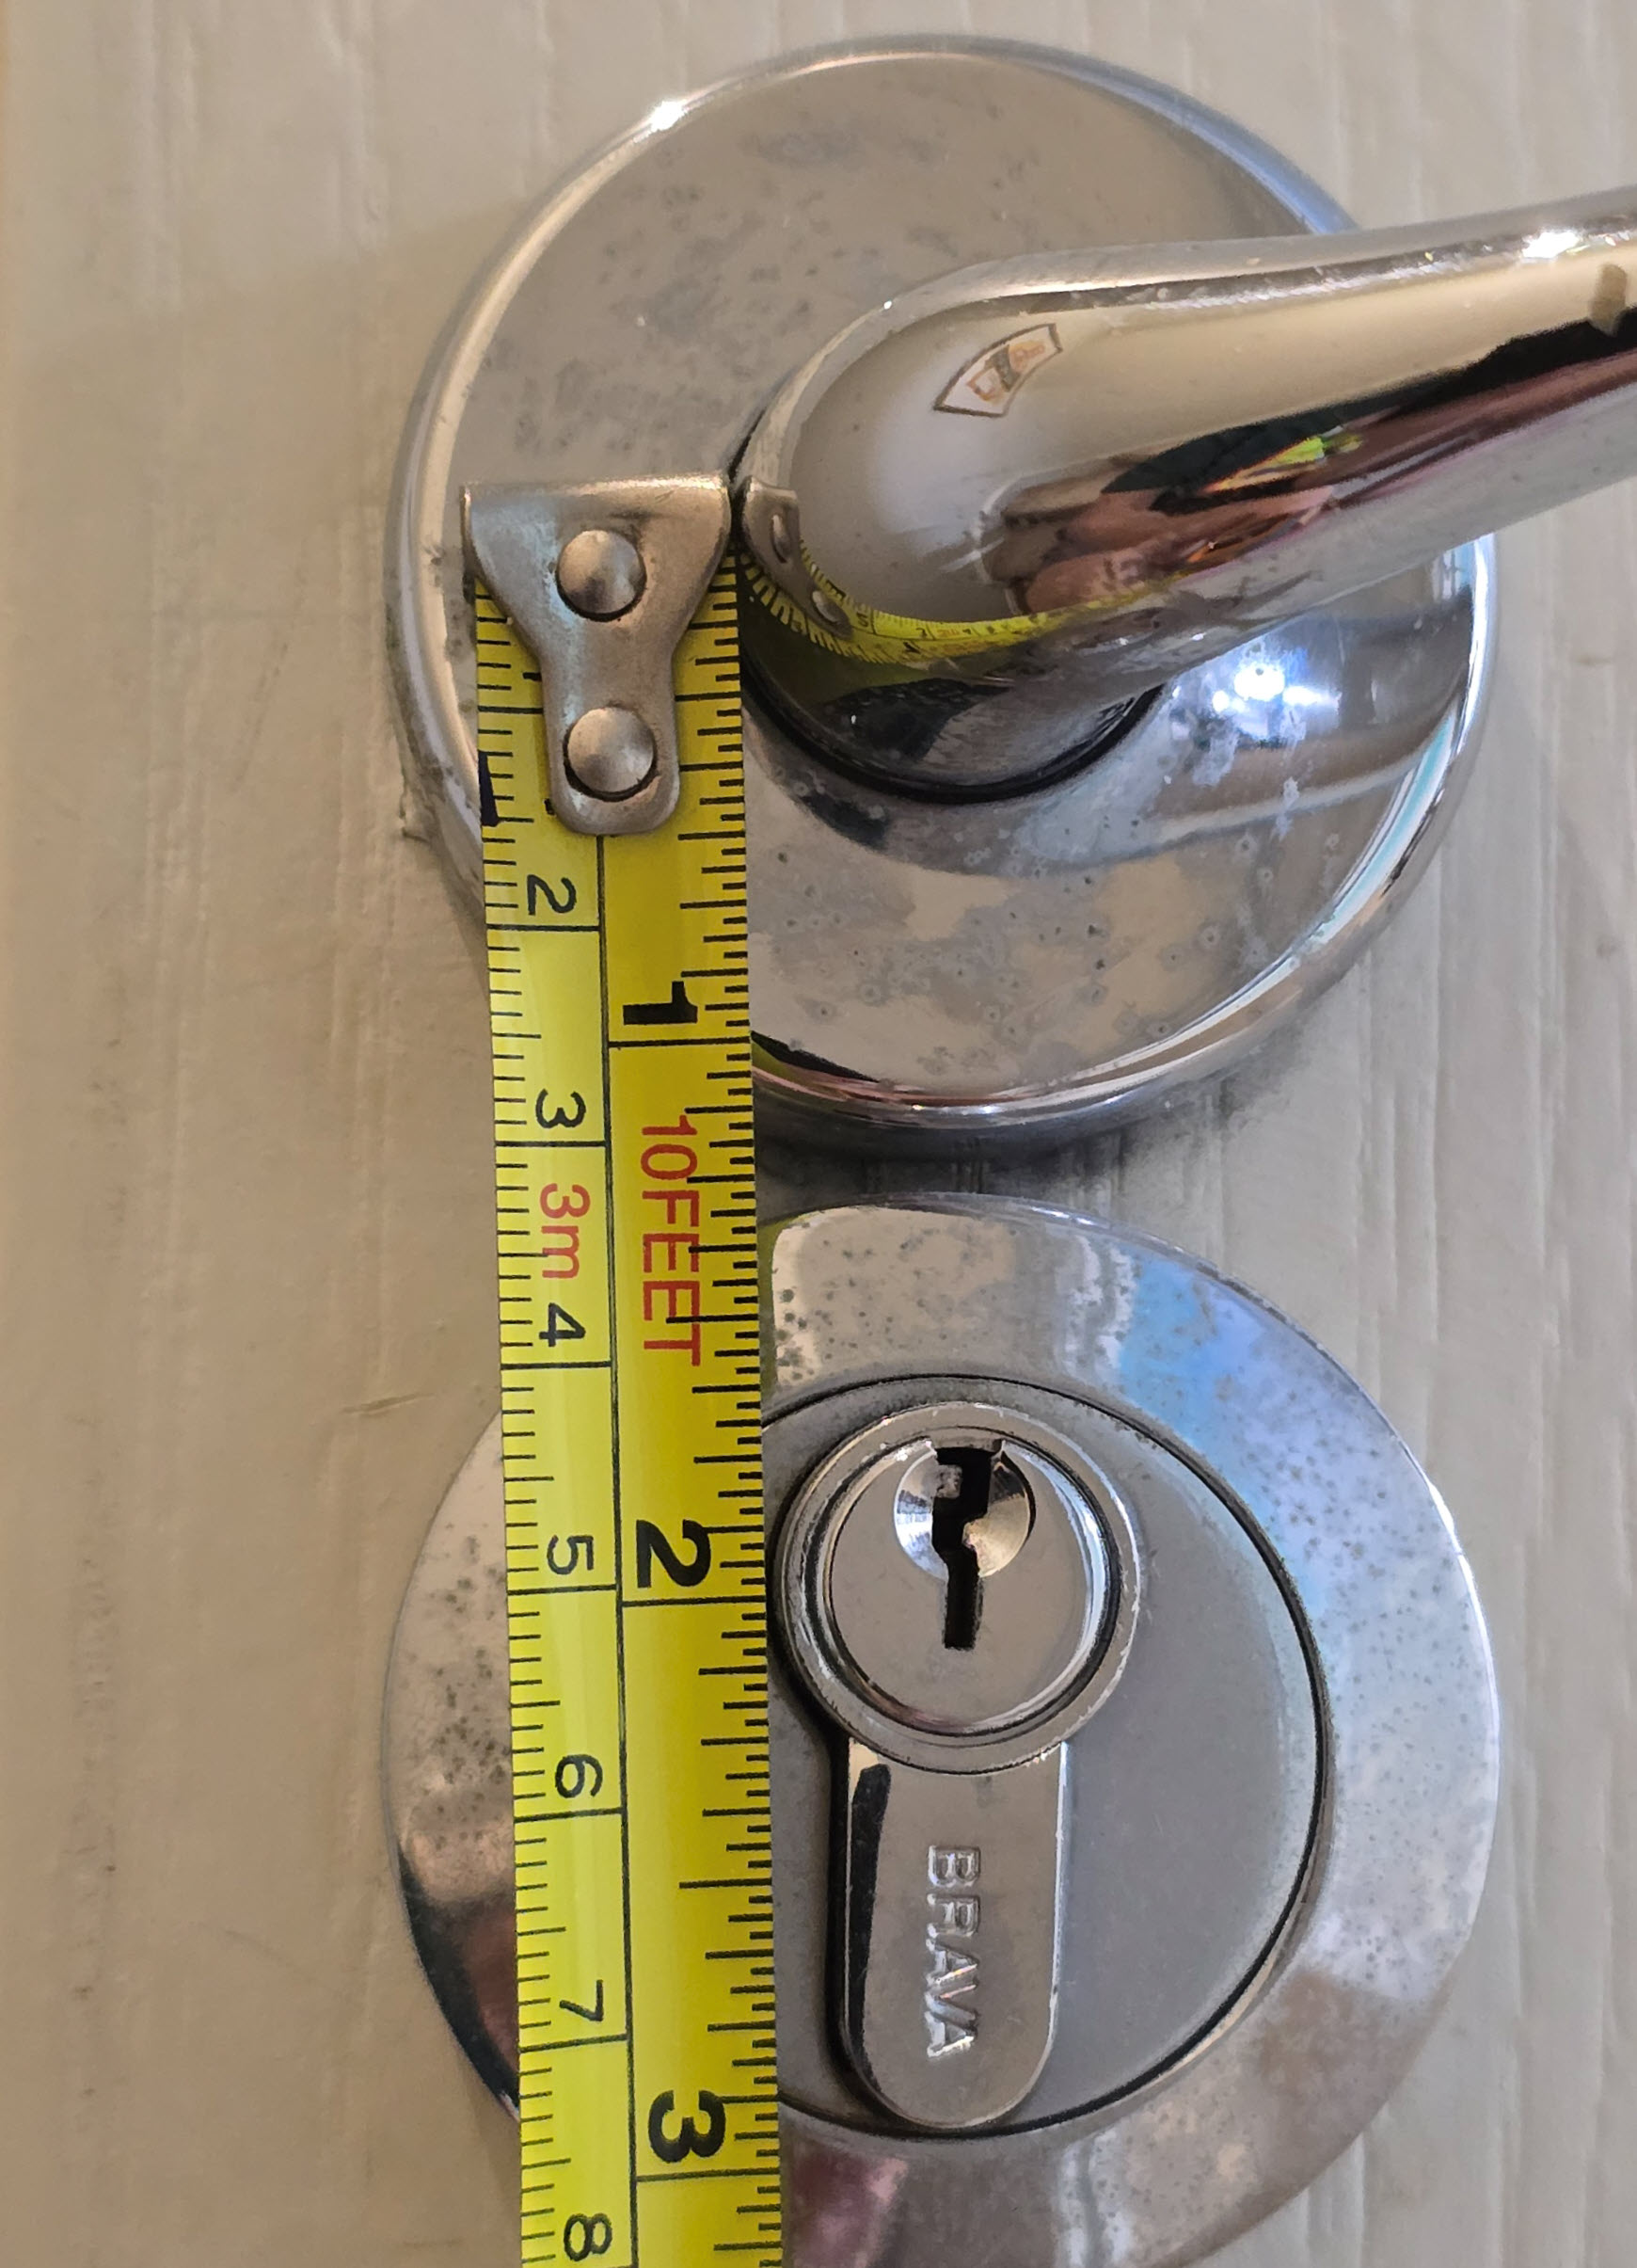
On a mortice lock with a separate handle and cylinder, the vertical distance between the two centres is called the pitch (Chapter 02 point (c)). Replacement mortice bodies, escutcheon plates and many smart locks are built around a set pitch, so this one matters.
Here the tape runs straight down from the lever to past the cylinder, with the scale facing the camera. If the terms backset, pitch and follower are new to you, what a mortice lock body actually is explains all three.
Centre to centre, tape running straight down the door.
Faceplate Height

The faceplate is the metal plate on the door edge. Its height, and where the latch and bolt sit along it, go a long way to identifying the lock body — and they tell us whether a new faceplate will cover the existing cut-out or leave a gap in the timber.
The tape starts level with the bottom of the faceplate and runs up past the top, so both ends read against the scale. The damaged timber above the plate is worth seeing too — it may need filling before a new lock goes in.
Tape alongside the faceplate, both ends visible.
 Faceplate Width and Door Thickness

One tape across the door edge gives two measurements: the faceplate width (point (f)) and the door thickness (point (a)). Door thickness decides which locks, spindles and cylinders will suit — see the door thickness ranges in Chapter 02.
The tape’s hook sits on one face of the door and the scale runs right across to the other, close enough that every millimetre mark is readable.
Close, square and sharp — two measurements in one photo.
Example 2 — Aluminium-Framed Glass Door
Aluminium doors are where photos matter most. The stile — the vertical frame member the lock sits in — is often narrow, and the lock body has to fit the cavity inside it. This client went the extra mile: after photographing both sides and the edge, they took the mortice lock out of the door and measured the lock and the empty cavity as well.
Both Sides of the Hardware


Straight-on shots of each side show how the door is used: a key cylinder on the outside and a thumbturn on the inside, both on long escutcheon plates. The plate shape and screw positions matter because any replacement needs to cover the existing holes in the aluminium.
 The Angled Shot: Plate, Lever and Faceplate
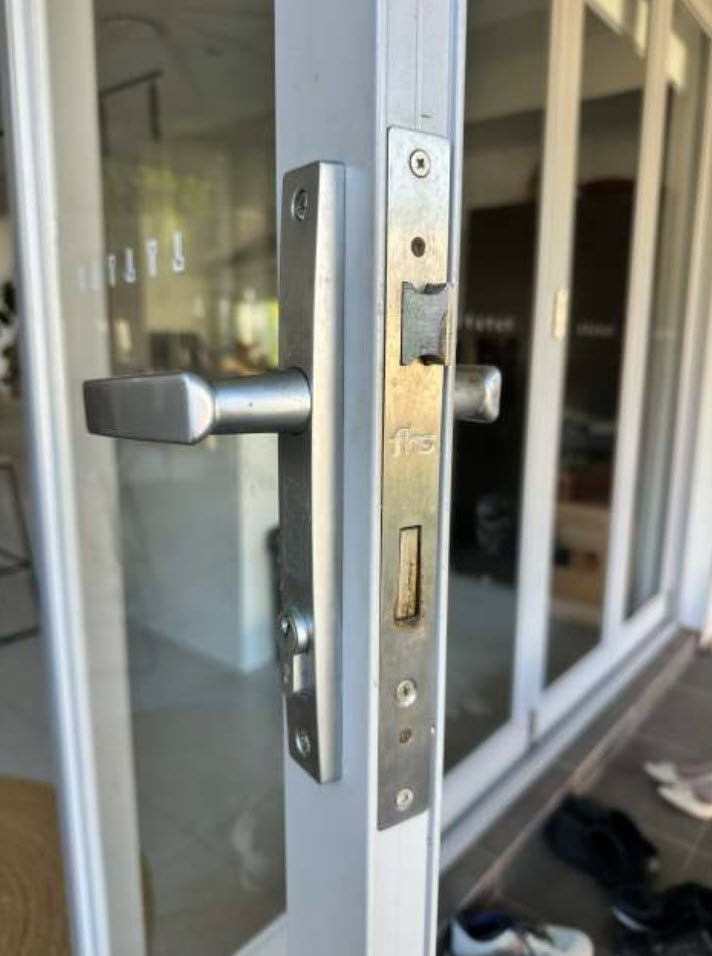
As in Example 1, the angled shot does the heavy lifting. With the door open we can see the narrow plate, the lever, the mortice faceplate with its latch and bolt, the maker’s stamp, and — most importantly — how little aluminium there is either side of the lock.
Stile width is the first thing we check on any aluminium door, because it rules whole categories of lock in or out. Chapter 02 sets out the stile width thresholds for aluminium doors.
One photo showing the plate, the faceplate and the stile.
Escutcheon Plate and Strike Plate

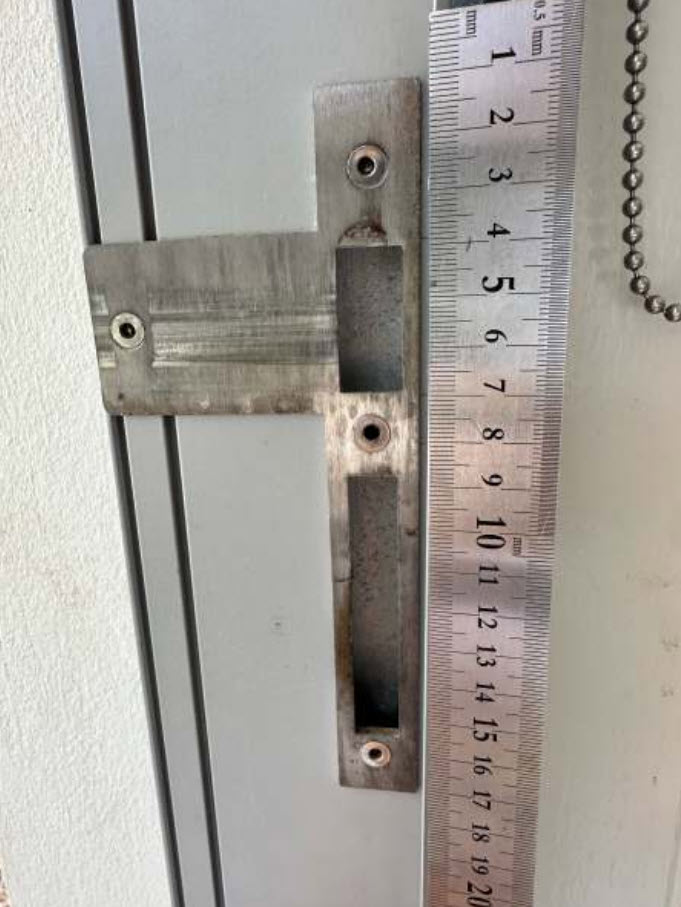
The escutcheon shot tells us how tall the existing plate is and where the lever and cylinder sit on it. If new hardware is smaller than the old plate, the old holes will show — which is exactly when you need a scar plate.
The strike plate shot covers the frame side of the door. It shows the strike’s shape and height and where its latch and bolt pockets sit, which tells us whether a new lock can use the existing strike or needs a new one.
 With the Lock Removed: Body and Cavity
With the mortice out of the door, the client photographed the lock body from three directions and then the empty cavity in the stile. This removes almost all of the guesswork: we can see the full size of the body and exactly how much room a replacement has.


The plan view with measurements is the standout.
The two cavity shots answer the question the lock itself cannot: how much room is left for a replacement body inside the stile. Put the body and cavity photos side by side and we can tell very quickly which replacement locks physically fit.

Where to Send Your Photos
 Our Free Recommendation Form
The easiest route is our free qualified locksmith recommendation form.
Or... email them to contact@terrys.team — there is no limit to how many photos you send us, and we will identify your door type and confirm what will fit. Be sure to give us some hints on the style of smartlock you are inerested in.
 Prefer Us to Come and Look?
If the door is complicated, or you would simply rather not measure it yourself, Gold Coast customers can book a site survey and have one of our locksmiths check the door in person.
Related Guides
The seven measurements that decide what fits, with lettered diagrams for each hardware type.
Step-by-step backset measurement, standard Australian sizes and what goes wrong with the wrong one.
LHI, RHI, LHO and RHO explained, and how to work out your door’s handing.
Mortice terminology, the five body families in the range, and how to identify a body already in your door.
The gap between your main door and security screen, and why it matters before you order.
When you would rather a Terry’s locksmith check the door in person on the Gold Coast.
Ready to Send Us Your Photos?
Upload your outside, inside and door-edge photos and a qualified locksmith will tell you what fits your door.
Ask an ExpertVisit Australia’s leading Smart Lock showroom and workshop:
Gold Coast Smart Locks
9/2 Prosper Crescent
Burleigh Heads, QLD
See working models, compare gateways, and get real advice before you commit.