


Wolflok WFK311 Replacement Standard Security Screws
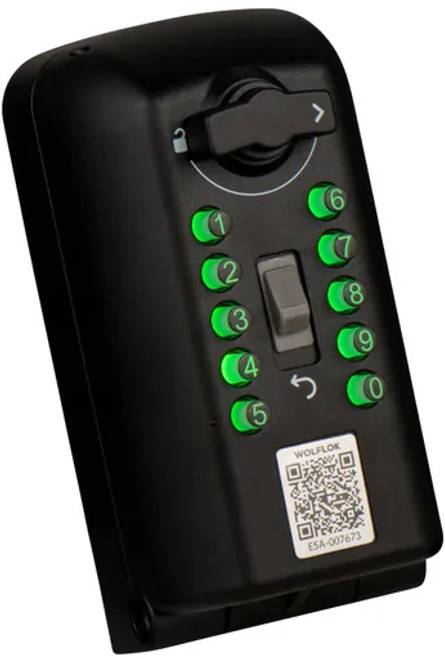
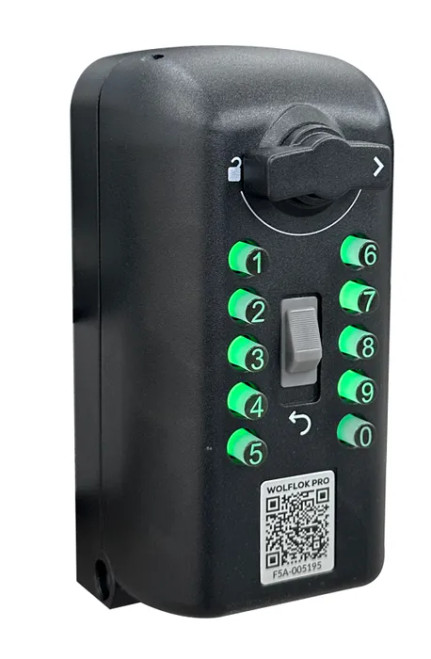
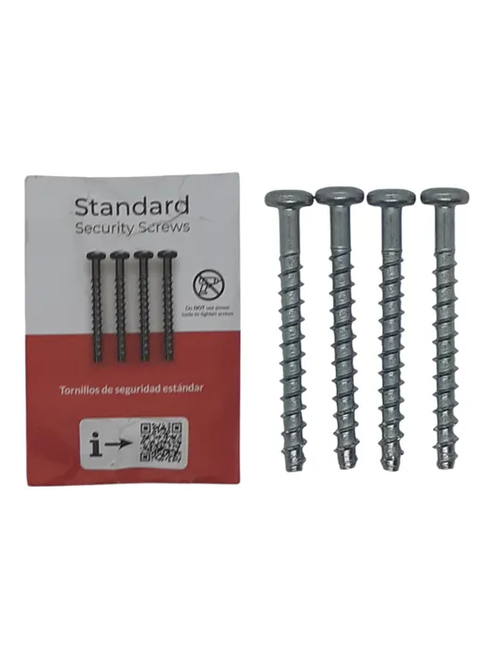
The Wolflok WFK311 Replacement Standard Security Screws are the official replacement standard security screws for the Wolflok and Wolflok Pro maximum-security key safes. Four 60mm self-tapping screws are supplied - the same fixings included in every new Wolflok box - and achieve LPS1175 Issue 8 A10 security certification when the key safe is mounted on brick, concrete, stone, or single-skin walls.
These screws are single-use by design. They cut their own thread on first installation; reusing them after removal significantly weakens the fixing and cannot maintain the certified security rating. If you need to move or reinstall your Wolflok, the WFK311 ensures you start fresh with the correct certified hardware.

Usually ships same day if ordered before 11am AEST (excludes weekends and Queensland public holidays).
 Key Features
- Official Wolflok replacement standard security screws - same fixings supplied with every new Wolflok unit
- Achieves LPS1175 Issue 8 A10 security rating when installed on brick, concrete, stone, or single-skin walls
- 4 x 60mm self-tapping masonry screws - no wall plugs required for standard masonry surfaces
- Compatible with both the Wolflok (960064) and Wolflok Pro (960071)
- Single-use design - screws cut their own thread on first installation; must not be reused
- Fitted by hand with a T30 Torx driver - Wolflok's instructions say not to use power tools on these screws, and not to over-tighten
- T30 Torx drive
 What's in the Box
Drill bits and a driver are not included - see the tools listed under Specifications.
 Suitable Uses
- Reinstalling a Wolflok or Wolflok Pro after relocation - screws must not be reused after removal
- Replacing damaged or stripped screws from a previous installation
- Mounting on brick, concrete, stone, or single-skin walls where A10 security certification is required
- Mounting on wood where LPS1175 certification is not a requirement (A10 not maintained on timber)
- Keeping a spare set on hand for rental or commercial property managers with multiple Wolflok units
 Wolflok Fixing Kit Range
This product is the bold row. Before drilling, review the common installation mistakes that can void certification.
 Specifications
 Frequently Asked Questions

The WFK311 screws are self-tapping - they cut their own thread into the substrate on first installation. Once removed, the thread they created is damaged or enlarged, meaning the screw can no longer achieve the same clamping force or pull-out resistance. Reusing them weakens the fixing, undermines the LPS1175 A10 security rating, and creates a risk of the unit working loose over time. Always order fresh WFK311 screws before reinstalling.

No. LPS1175 A10 certification is achieved only when the WFK311 screws are used on brick, concrete, flat stone, or single-skin walls. Wood installation is permitted, but the LPS1175 certification is not maintained on timber substrates. For wood, use a 4mm standard (not masonry) drill bit and ensure the substrate is at least 25mm thick - ideally 60mm or more, and fixed into a stud.
The WFK311 (this product) are 60mm self-tapping screws that achieve A10 certification and suit both Wolflok models. The WFK001FK XL Screws & Wall Plugs are 100mm screws with wall plugs that achieve the higher B1 rating on the Wolflok Pro, including on rendered walls - they are included with the Wolflok Pro box, are available separately for Pro users who need a replacement set, and are also the rendered-wall fixing for the standard Wolflok.
Use the drill to make the holes only. Wolflok's instructions are to fit the WFK311 screws by hand with a T30 Torx driver, without power tools, and not to over-tighten them - over-torquing risks stripping the thread or cracking the substrate, which will compromise both the fixing and the security rating. (The longer WFK001FK XL screws are different: Wolflok allows a ratchet or power tool with care, finishing by hand.)

For masonry (brick, concrete, stone): a 5mm masonry drill bit at least 70mm long, a T30 Torx screwdriver, and a standard drill. For wood: a 4mm standard drill bit (not masonry), at least 70mm long, and a T30 Torx screwdriver. The AP001 Fitting Pack (5mm masonry drill bit + T30 screwdriver) is Wolflok's spare kit for this job.
Additional Information
The LPS1175 A10 certification requires correct installation. Key rules from the Wolflok instruction manual: always drill into the brick face, never into mortar; the unit must sit flat to the wall (if it rocks, do not install there); maintain a minimum of 150mm from any edge or corner of a masonry surface; use the supplied paper marking template rather than the unit itself as a drilling guide (dust entering the mechanism may cause failure); and fit the screws by hand, without over-tightening. If you are unsure whether DIY installation is appropriate for your wall type, see our guide to when DIY installation is appropriate and the common installation mistakes.

If your wall has a rendered surface (render up to 20mm deep), the standard WFK311 screws are not recommended. The WFK001FK XL Security Screws & Wall Plugs are the correct option for rendered masonry - they achieve the higher B1 security rating on the Wolflok Pro and are the rendered-wall fixing Wolflok specifies for the standard Wolflok. The WFK001FK kit is included in every Wolflok Pro box.

For an overview of how mechanical key safes work and guidance on best practice around installation and placement, see our guide: how a mechanical key lock box works, and browse the Key Storage range.
 Warranty
2-year warranty as standard on the full product including the illumination module. Register for free at wolflok.com/product-registration (Australia supported) to extend to 5 years on mechanical parts. Batteries are user-replaceable and not covered. Proof of purchase required for all claims. Returns & Warranty
 Download PDF Resources
Manual for the standard Wolflok (960064), one of the two key safes these screws fit - masonry installation with the WFK311 screws (pages 18-21), timber installation (pages 21-23) and the spare-parts list (page 28).
Manual for the Wolflok Pro (960071), the other key safe these screws fit - A10 installation with the WFK311 screws (pages 23-25), timber installation and the spare-parts list (page 33).
Specification sheet for the standard Wolflok (960064) - LPS1175 A10 on brickwork, concrete and stone with the supplied fixings, and the spare-parts ordering table.
Specification sheet for the Wolflok Pro (960071) - A10 with the WFK311 and B1 with the WFK001FK, plus the spare-parts ordering table.
Brochure for the Wolflok and Wolflok Pro key safes these screws fit - both specification panels with their spare-parts ordering tables and a range comparison.
PDF Files - Wolflok WFK311 Replacement Standard Security Screws
Manual for the standard Wolflok (960064), one of the two key safes these screws fit - masonry installation with the WFK311 screws (pages 18-21), timber installation (pages 21-23) and the spare-parts list (page 28).
Manual for the Wolflok Pro (960071), the other key safe these screws fit - A10 installation with the WFK311 screws (pages 23-25), timber installation and the spare-parts list (page 33).
Specification sheet for the standard Wolflok (960064) - LPS1175 A10 on brickwork, concrete and stone with the supplied fixings, and the spare-parts ordering table.
Specification sheet for the Wolflok Pro (960071) - A10 with the WFK311 and B1 with the WFK001FK, plus the spare-parts ordering table.
Brochure for the Wolflok and Wolflok Pro key safes these screws fit - both specification panels with their spare-parts ordering tables and a range comparison.
Wolflok Warranty
Warranty Summary
How to Make a Claim
- Contact Terry's Tradies Pty Ltd and its associated websites, trading names, and subsidiaries (trading as Gold Coast Smart Locks) in the first instance - do not contact the manufacturer directly for warranty claims.
- Have your proof of purchase ready (order confirmation or receipt).
- Describe the fault clearly, including the product model (Wolflok or Wolflok Pro) and when the issue first appeared.
- If directed to return the product, ensure it is securely packaged. Do not attempt disassembly - this may void the warranty.
Extend Your Warranty to 5 Years - Free Registration
Registering extends the mechanical parts warranty from 2 years to 5 years at no cost. The registration form at wolflok.com/product-registration is set up for Australian buyers - just select Australia as your country, enter your product model and date of purchase, and you're done. No registration deadline is stated, so you can register at any time after purchase.
Note: The 5-year extension applies to mechanical parts only. The illumination module remains covered for 2 years regardless of registration, and batteries are excluded from all warranty coverage.
 Exclusions
The following are not covered under the Wolflok warranty:
- Damage caused by modification of the product - any modification voids warranty
- Damage resulting from installation not carried out in accordance with the supplied instructions (including use of incorrect fixings or surface types)
- Damage caused by misuse, abuse, or neglect
- Normal wear and tear
- Batteries (user-replaceable consumables)
- The illumination module beyond 2 years (not covered under the 5-year extended registration)
- Damage caused by conditions beyond the product's rated operating range
Important Notes
The product must be installed and used as described in the supplied instruction manual. Security accreditation (LPS 1175) may also be invalidated if incorrect fixings or surface types are used. Do not reuse screws if reinstalling - contact your supplier for replacement fixings.
No master or reset code exists. Wolflok key lock boxes have no master or reset code function. Lost codes cannot be recovered by the manufacturer, distributor, or retailer.
Our goods come with guarantees that cannot be excluded under the Australian Consumer Law. You are entitled to a replacement or refund for a major failure and compensation for any other reasonably foreseeable loss or damage. You are also entitled to have the goods repaired or replaced if the goods fail to be of acceptable quality and the failure does not amount to a major failure.

Confused? Overwhelmed? We get it.
Choosing the right smart lock can be genuinely tricky - door types, backsets, app platforms, compatibility with your existing hardware... there is a lot to consider. We have decades of experience fitting locks of all types, including smart locks, and we are happy to help.
Our expert recommendation service is free. Upload a few photos of your door and describe what you need, and one of our qualified locksmiths will give you a personalised recommendation.
Get Your Free Recommendation →How it works - three easy steps:
1. Upload photos
A few clear shots of your door, lock and frame - inside and out.
2. We assess
Our locksmith reviews your setup and requirements - door type, weather exposure, how you want to use it.
3. You get a recommendation
A personalised recommendation tailored to your door, budget and needs. No pressure, no upsell.
Also useful while you are deciding: